


Cheese and charcuterie plates are both delicious and beautiful. You can customize them with anything you like! Here are some of our tips to build the perfect platter for your next gathering or a simple dinner at home.
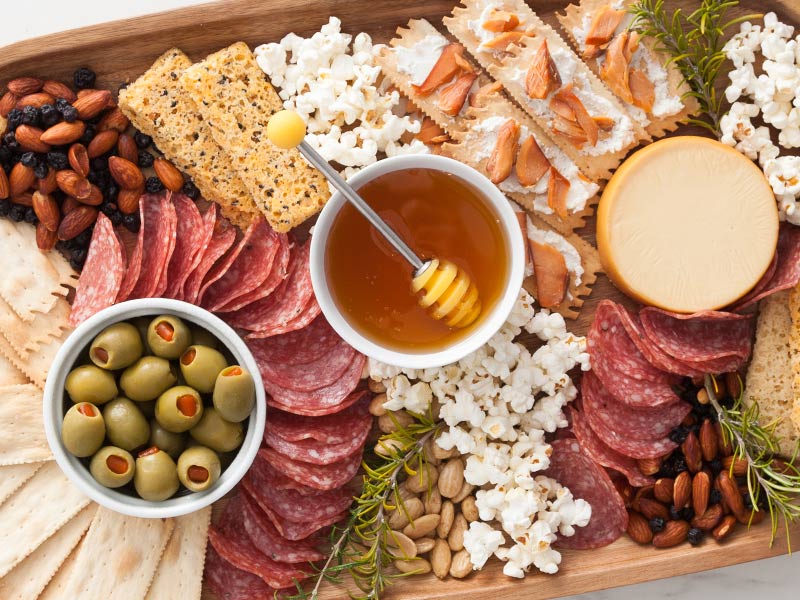
Step 1: Pick out the perfect cheese platter and bowls
Your platter can be any shape! When picking out your platter, consider how many people you are serving and how many types of food you’ll display before deciding on a size. Then find small snack-sized bowls that will fit directly onto the platter that you can arrange the other items around. For smaller platters, you can place these off the side, but for larger platters, consider 2 or 3 small bowls that you can fit directly onto the platter so that you can make cheese, cracker, or meat arrangements in circles or swirls.
Step 2: Cheese, meat, bread, crackers and more! (All the good stuff!)
Charcuterie plates can be made up of many different types of items, including but not limited to: cheese, bread, salami, prosciutto, crackers, pickled asparagus, olives, crostini, hummus, pita bread, sundried tomatoes, herb spreads, and tapenades. The more items you have with different colors, the more beautiful your arrangement will be! Personally, we love having at least 3 different types of cheese and 2 types of crackers for color and variety. (We recommend La Panzanella Crackers!) It’s fun to discover which cracker or bread each person thinks tastes best with which cheese or tapenade.
Step 3: Designing your arrangement
Once you’ve placed the bowls, the next step is deciding on a design with your different items. Will they all be in a straight line? In circles? In waves? Starring outward from the bowls to the edge of the plate? Start with one type, layering each piece slightly overlapping the next. Do this with each type of cheese and meat that you have, along with any other items that lay flat. Breads and crackers are most often toward the edges of the platter, but they don’t have to be! The next step is to fill the bowls. Generally, they are used for dips, nuts, olives, dried fruit, etc. Nuts and dried fruit can also live directly on the platter, either in clusters or placed as lines or accents.
Step 4: The finishing touches
Finish off the platter by layering in some rosemary or other fresh stemmed herbs. Your platter will smell delicious and give another added visual pop. If you think you need any additional items, popcorn or chocolate, especially dark chocolate or chocolate-covered almonds work well to fill the small bowls or even as a side dish to your main plate. Remember to put out cheese knives and spreading knives handy for everyone! If you’re having a small gathering during COVID, we highly recommend a set of cutlery per person so that there is no sharing between utensils. We love Repurpose Compostable plates and cutlery for that reason.